

How to Make Breakfast Sandwiches Like a Pro
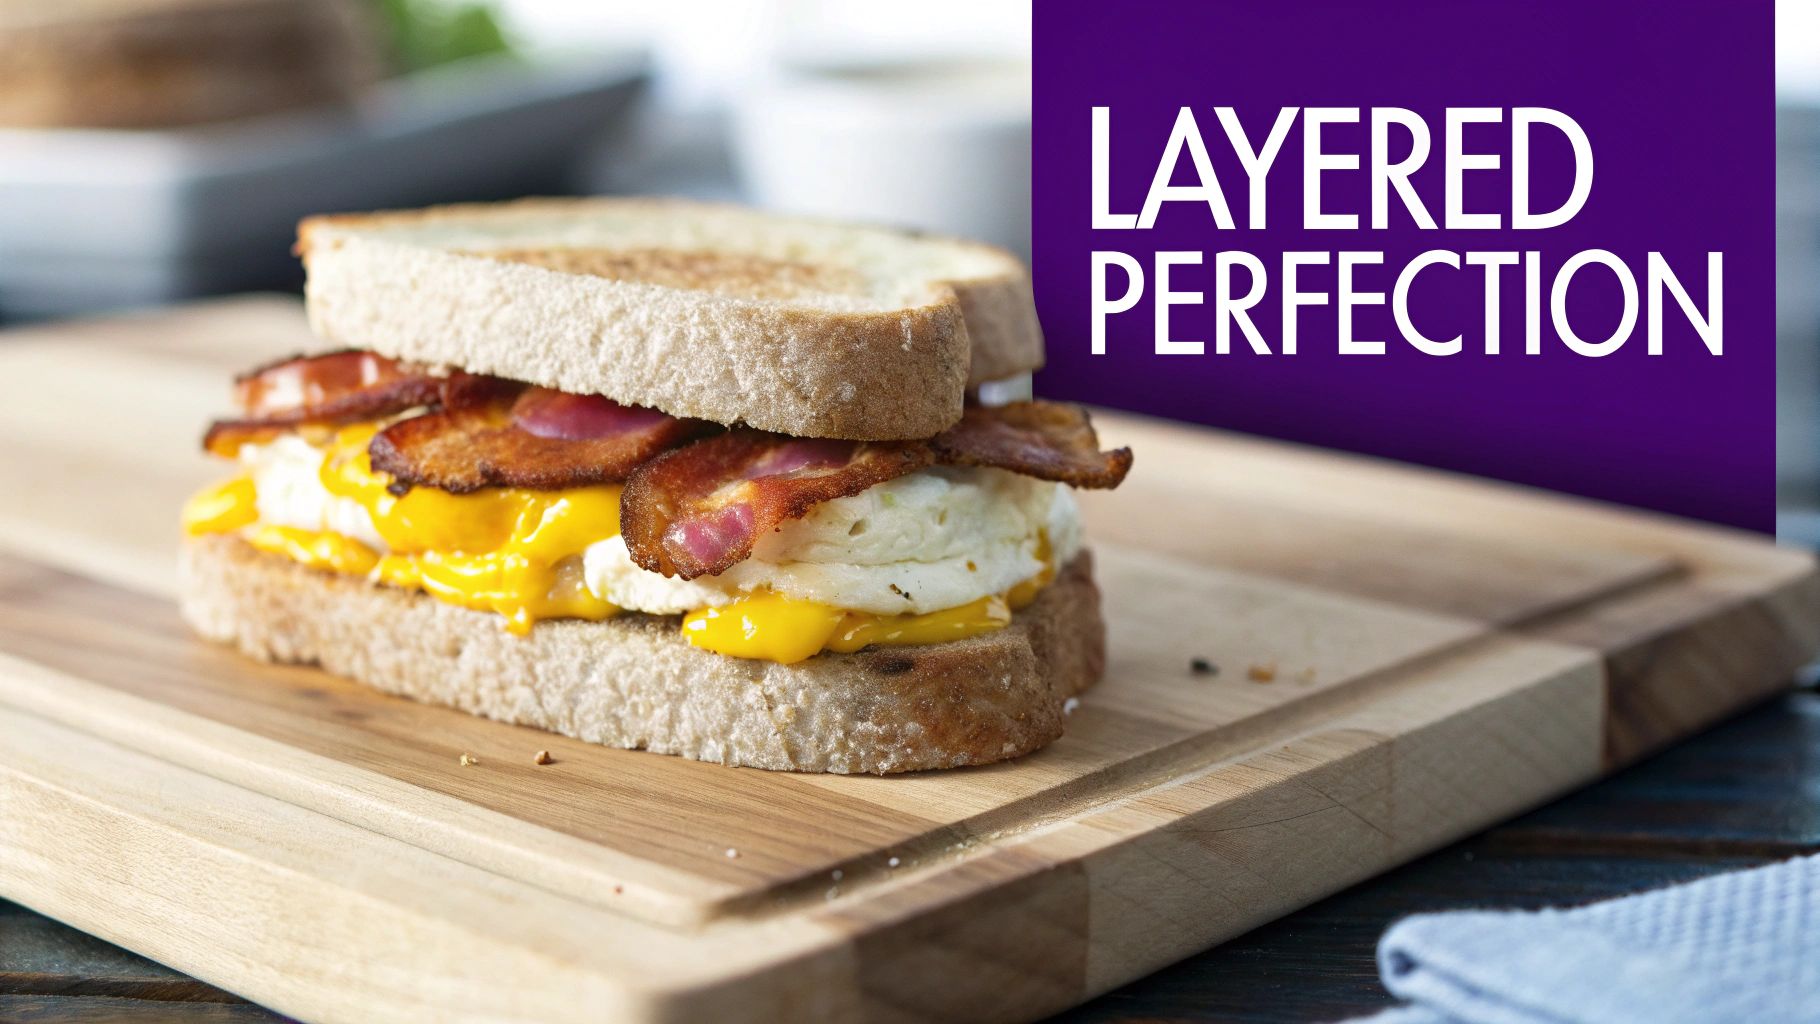
Knowing how to make a truly great breakfast sandwich comes down to mastering four things: perfectly toasted bread, savoury protein, melted cheese, and a killer sauce. A top-tier sandwich is all about building layers of taste and texture, bringing these pieces together into a satisfying, portable meal that can power your entire morning.
Crafting the Ultimate Breakfast Sandwich
Welcome to your guide for building breakfast sandwiches that will make you forget the drive-thru forever. This isn't just a recipe—it's a blueprint for understanding why this humble meal has become a morning staple for millions. It’s about more than just stacking ingredients; it’s about turning a simple concept into something truly memorable.
The real beauty of the breakfast sandwich is in its balance and versatility. It strikes the perfect harmony between hearty, comforting, and convenient. This combination has made it a powerhouse menu item for cafes and a go-to for home cooks. Its popularity is undeniable; Americans consume approximately 3.6 billion breakfast sandwiches every year, a testament to its central role in modern morning routines.
The Four Pillars of a Perfect Sandwich
To create a sandwich that really stands out, you need to nail its foundational components. Each one plays a critical role in the final product, and getting them right is what separates a good sandwich from a great one.
Let’s take a look at the core components that make a breakfast sandwich sing. Each element has a job to do, contributing to the overall flavour, texture, and structure. Understanding these roles is the first step to building a better sandwich from the ground up.
Core Components of a Five-Star Breakfast Sandwich
| Component | Role in the Sandwich | Popular Choices |
|---|---|---|
| The Bread | Provides structure and a satisfying bite. It needs to be sturdy enough to hold everything without getting soggy. | Brioche buns, English muffins, sourdough, ciabatta |
| The Protein | The heart of the sandwich, offering savoury flavour and substance that keeps you full. | Bacon, sausage patties, peameal bacon, fried egg |
| The Cheese | Acts as the delicious glue, adding creaminess, richness, and a salty kick that ties it all together. | Cheddar, Swiss, provolone, American cheese |
| The Sauce | Adds moisture and a final layer of complexity. This is where you can get creative and elevate the entire experience. | Ketchup, aioli, hot sauce, hollandaise |
By focusing on these four pillars, you can move beyond just assembling ingredients and start building sandwiches with real intention and flavour.
A truly great breakfast sandwich is a masterclass in texture and flavour. The crispiness of the bread, the tenderness of the egg, the saltiness of the bacon, and the creaminess of the cheese all have to work together. Mastering this balance is the secret.
For a little inspiration on how these elements come together in a professional setting, you can check out the creative combinations on the East End Annie's menu. This guide will give you the techniques and tips to transform your kitchen into your new favourite breakfast spot.
Let’s get cooking.
Choosing Your Ingredients and Tools
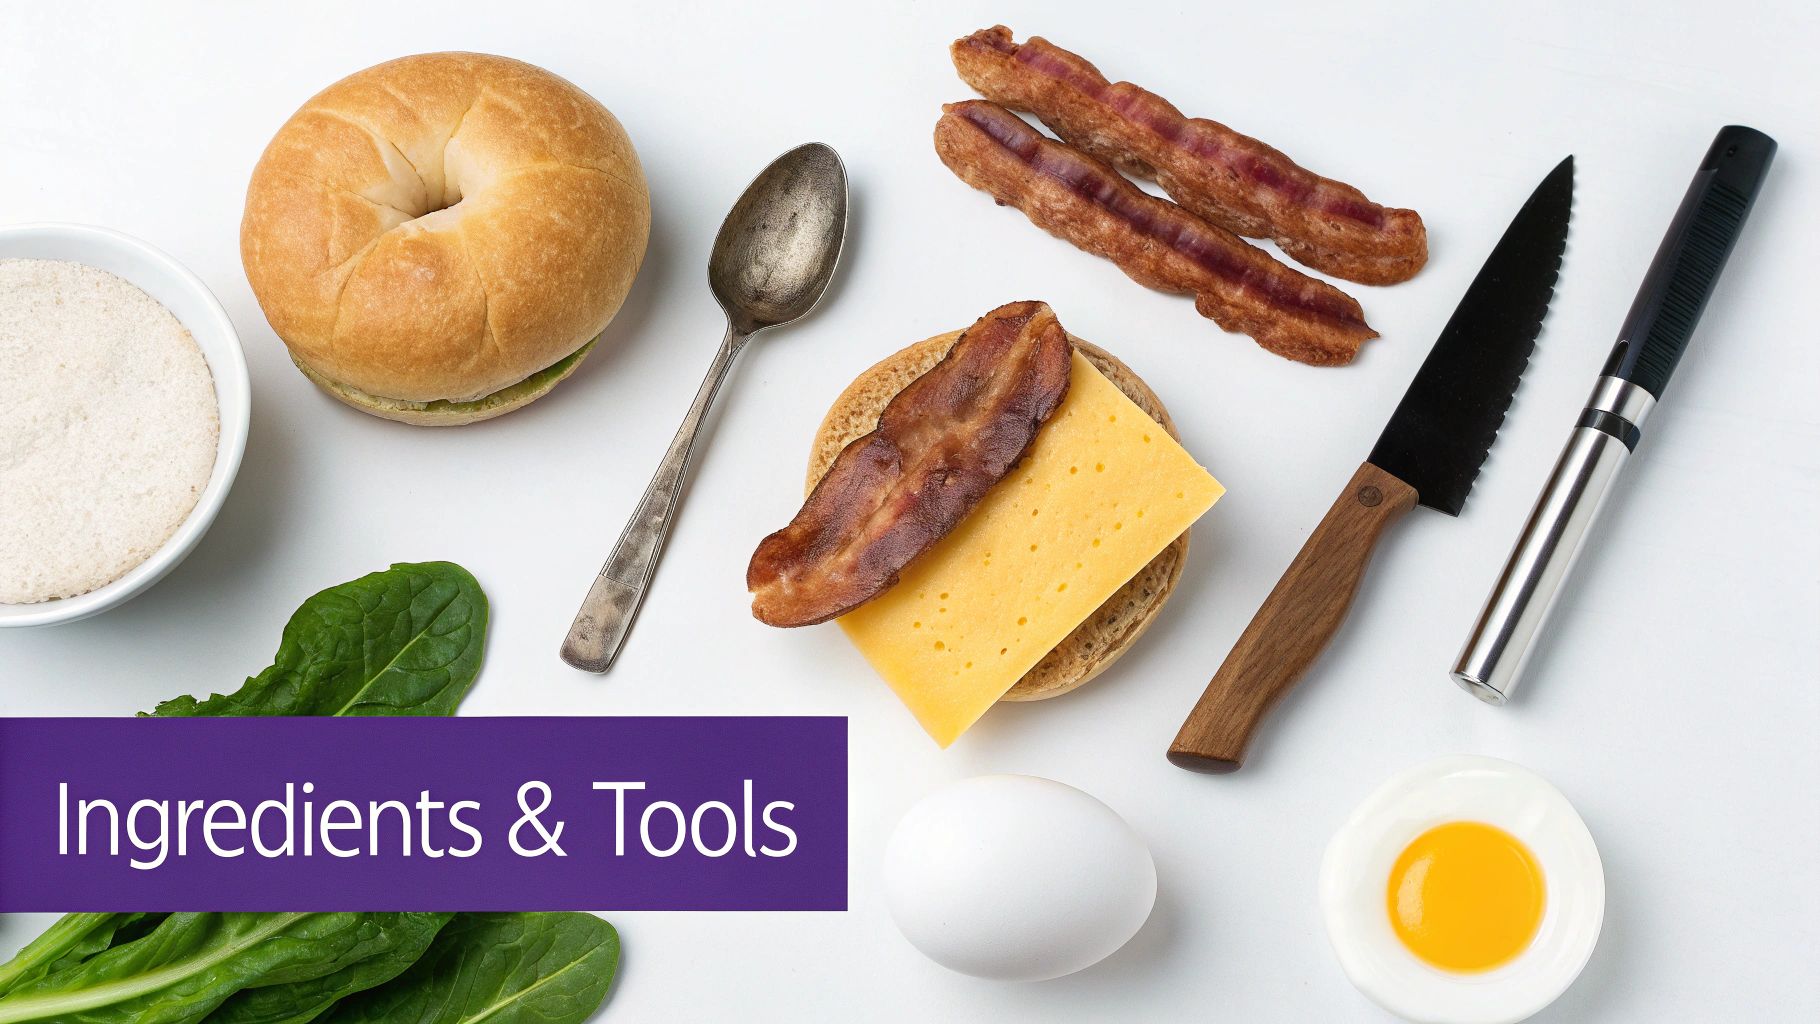
A truly memorable breakfast sandwich starts long before you hear the sizzle of bacon in the pan. It begins with making smart choices in your kitchen—picking ingredients that deliver the best flavour and texture and grabbing the right tools for the job. This is the groundwork for sandwich greatness.
Let's get past the basics and dig into the details that really make a difference. Every single component matters, from the bread holding it all together to the cheese that gives you that perfect, gooey pull.
Selecting the Perfect Bread
The bread is more than just a container; it's the foundation of your entire creation. It needs to be sturdy enough to handle all the fillings without falling apart or turning soggy, but still tender enough for a satisfying bite.
Here are a few of our go-to choices for a solid sandwich base:
- English Muffins: A classic for a reason. Their famous nooks and crannies are perfect for catching melted butter and sauce, and they toast up beautifully for a firm, chewy texture.
- Brioche Buns: If you're after a richer, more decadent sandwich, the buttery sweetness of a brioche bun is hard to beat. Its soft texture is a fantastic contrast to crispy bacon.
- Bagels or Croissants: A hearty, substantial option that’s ideal for a fully loaded sandwich. A toasted everything bagel, in particular, adds another layer of savoury flavour.
- Sourdough or Ciabatta: For a bigger build, artisan breads like sourdough or ciabatta offer a great chew and a robust structure that won't quit.
While you're building your masterpiece, don't feel like you have to make everything from scratch. Picking up some high-quality pastries or buns can be a real time-saver and still give you delicious results.
Choosing Your Protein and Cheese
The protein is the heart of the sandwich, bringing that savoury depth that makes it so satisfying. Bacon and sausage might be the traditional favourites, but there are so many fantastic options to play with.
Crispy, thick-cut bacon gives you that salty crunch, while a well-seasoned sausage patty provides a juicy, flavourful centrepiece. For a Canadian twist, peameal bacon is a leaner but equally delicious choice. And of course, don't forget the egg—it's a protein powerhouse all on its own.
When it comes to cheese, the name of the game is meltability. A good melting cheese acts like a delicious glue, binding all the ingredients together.
- Classic Cheddar: Sharp and tangy, it cuts right through the richness of the other ingredients.
- Provolone or Swiss: These offer a milder, nuttier flavour and create that beautiful cheese pull everyone loves.
- American Cheese: Let's be honest, nothing melts creamier. It's the go-to for that classic diner-style experience.
Here's a little secret for perfectly melted cheese: add it to your egg or protein during the last minute of cooking. Then, just pop a lid on the pan to trap the steam. You'll get a fast, even melt every single time.
Essential Tools for Sandwich Success
You don't need a professional kitchen to make amazing breakfast sandwiches, but having a few key tools will make the whole process smoother and a lot more fun. The right equipment helps ensure every part of your sandwich is cooked perfectly.
Your essential toolkit should include:
- A Good Non-Stick Pan: This is non-negotiable for cooking eggs. You need them to slide right out and onto your sandwich without sticking. A well-seasoned cast-iron skillet is also a fantastic choice.
- A Flexible Spatula: A thin, flexible spatula, either metal or silicone, is crucial for getting under eggs and flipping them without breaking the yolk.
- Egg Rings: Want perfectly round eggs that fit neatly on an English muffin or bagel? Silicone or metal egg rings are a game-changer. They give your sandwich a clean, professional look.
The idea of stacking eggs, meat, and cheese between bread isn't new; the first known recipe actually showed up back in 1897. Today, regional variations are thriving, especially in places like California where local ingredients like avocado and artisan cheeses are common. This creativity is why nearly 79% of adults enjoy sandwiches weekly. You can discover more about the history of sandwiches at The Food Timeline.
This is where the real art comes in. Once you've got your ingredients lined up and your tools are ready, it's time to cook and build. This is the craft that turns a few simple items into a breakfast sandwich that’s genuinely special. The goal is to get every single component to its peak flavour and texture, all at the same time.
It might sound like a bit of a juggling act, but with a little strategy, it's totally manageable. We’ll go through each element—from getting the perfect toast on your bread to nailing the eggs and making sure your protein is cooked just right. It’s all about timing and technique.
Building a Foundation: The Perfect Toast
Never, ever underestimate the power of a perfectly toasted piece of bread. This step is your first line of defence against a soggy sandwich. Toasting creates a firm, slightly dehydrated barrier that stops moisture from the fillings from seeping in, ensuring your sandwich holds its own from the first bite to the last.
Whether you're using an English muffin, a brioche bun, or a slice of sourdough, aim for an even, golden-brown colour. You can use a toaster, a hot pan with a smear of butter, or even a few minutes under the broiler. The point is to create a surface that offers a satisfying, gentle crunch to contrast with the soft fillings inside.
Mastering the Eggs for Your Sandwich
The egg is often the star of the show, so cooking it specifically for a sandwich is a must. The best method really depends on the kind of experience you’re after. Are you looking for a neat, contained bite, or do you live for the glorious mess of a runny yolk?
Here are three go-to methods, each tailored for sandwich success:
- The Folded Omelette: This is my personal favourite for a mess-free, portable sandwich. Whisk one or two eggs, pour them into a hot, lightly buttered non-stick pan, and let the bottom set. As it cooks, gently push the cooked egg from the edges toward the centre, tilting the pan so the runny egg fills the gaps. Once it's mostly set, fold it into a square that fits your bread perfectly. It’s structured, clean, and delicious.
- The Classic Fried Egg: For anyone who craves a runny yolk, a fried egg is the only way to go. Cooking it over-easy or over-medium delivers that rich, liquid gold centre. A great pro tip is to use an egg ring in the pan; it creates a perfectly round egg that sits neatly on your sandwich.
- Creamy Scrambled Eggs: Soft, creamy scrambled eggs can work beautifully, but you have to be mindful of their moisture. Cook them just a bit firmer than you normally would to keep them from making the bread soggy. Adding a slice of cheese on top as they finish cooking helps hold them together.
Cooking Your Protein to Perfection
Whether you've picked bacon or sausage, the goal is consistency every time. For bacon, the pan-fry versus baking debate is a classic. While pan-frying has that nostalgic sizzle, baking is our go-to for perfect, evenly cooked strips without all the splatter.
Just lay your bacon strips on a wire rack set over a baking sheet and bake at 205°C (400°F) for about 15-20 minutes. The hot air circulates all around the bacon, rendering the fat and leaving you with consistently crispy results. For sausage patties, a hot pan is your best friend. Press them down gently with a spatula as they cook to get a great sear and make sure they’re cooked through.
A Note on Timing: The secret to a hot, fresh sandwich is getting your cooking in sync. The bacon in the oven takes the longest, so start that first. While it’s baking, you can toast your bread and get your eggs ready. Everything should finish within minutes of each other.
The Art of Strategic Assembly
Okay, let's bring it all together. The order you layer your ingredients in matters more than you might think. A thoughtful assembly isn't just stacking; it's architecture. It guarantees structural integrity and a balanced bite every single time.
Here’s a reliable layering strategy to get you started:
- Bottom Bread First: Place your toasted bottom half on the plate. If you're using a sauce like aioli or mayo, spread it on now. This adds another moisture barrier.
- Add the Cheese: Lay your slice of cheese directly on the warm bread. This helps it start melting from the residual heat. Alternatively, you can melt it on your protein right in the pan.
- Layer the Protein: Add your crispy bacon or juicy sausage patty on top of the cheese. Its solid structure creates a stable base for the egg.
- Position the Egg: Gently place your cooked egg—whether it's folded, fried, or scrambled—onto the protein.
- Finish with the Top: Add any final sauce to the top bun and place it on top to complete your masterpiece. This method keeps the more delicate egg protected in the centre and ensures every bite has the perfect ratio of ingredients. Learning how to make breakfast sandwiches this way elevates a simple meal into something truly special.
Time to Get Creative: Breakfast Sandwich Variations
Once you’ve nailed the classic assembly, the real fun begins. Knowing how to build a basic breakfast sandwich is just the starting point—the next step is making it your own. Moving beyond the standard bacon, egg, and cheese opens up a whole world of flavour combinations that can suit any taste or dietary need.
This is your chance to experiment in the kitchen and turn a simple morning meal into something truly special. Whether you're vegetarian, vegan, or avoiding gluten, a delicious, satisfying breakfast sandwich is completely within reach.
Vegetarian and Vegan Options That Don't Disappoint
Switching out traditional meat proteins doesn't mean you have to sacrifice flavour. In fact, some of the most memorable sandwiches. We've made are entirely plant-based, adding incredible texture and depth you just don't get from bacon or sausage. It’s all about finding the right swaps.
Here are a few of my go-to substitutes for a stellar vegetarian or vegan breakfast sandwich:
- The Protein: A seasoned tofu scramble gives you a texture surprisingly close to scrambled eggs. Plant-based sausage patties have also come a long way in recent years, offering a seriously savoury and satisfying bite. For a unique vegetarian spin, try thick slices of grilled halloumi for a salty, chewy centrepiece.
- The Egg: Beyond the tofu scramble, you can find excellent commercial vegan egg patties that cook up quickly and mimic the feel of a classic folded omelette.
- The Cheese: The vegan cheese market has absolutely exploded. Look for plant-based cheddar or provolone slices specifically made to melt well—that gooey factor is non-negotiable.
Going Gluten-Free Without Compromise
Finding gluten-free bread that doesn’t fall apart at the first sign of a juicy filling used to be a real challenge. Thankfully, today’s options are much more reliable and delicious. I recommend looking for sturdy gluten-free English muffins or bagels; they're designed to be toasted and hold up well to stacking.
Another great trick is to forget the bun entirely. Two crispy, well-seasoned hash brown patties make a fantastic, naturally gluten-free "bread" that adds an extra layer of crunch and flavour.
My Pro Tip: Structure is everything with a gluten-free sandwich. Always toast your bread alternative well. I also like to use a slice of cheese as "glue" on both the top and bottom to help hold everything together.
To make things even easier, here’s a quick guide to building a breakfast sandwich for any diet.
Breakfast Sandwich Variations for Every Diet
| Dietary Need | Bread Swap | Protein Swap | Cheese/Sauce Swap |
|---|---|---|---|
| Vegetarian | Any standard bun | Grilled halloumi, fried egg, plant-based sausage | Regular cheese, pesto aioli, chipotle mayo |
| Vegan | Vegan-certified bagel or sourdough | Tofu scramble, tempeh bacon, vegan sausage patty | Dairy-free cheese slices, vegan mayo, avocado |
| Gluten-Free | GF English muffin, hash brown patties | Bacon, sausage, ham, or any plant-based option | Regular or dairy-free cheese, your favourite sauce |
These swaps are just a starting point. Feel free to mix and match until you find the combination that works perfectly for you.
Crafting Your Signature Sandwich
This is where you can truly let your personality shine. By combining different flavours and textures, you can create a breakfast sandwich that rivals any gourmet café. The demand for high-quality, creative sandwiches is surprisingly strong. For instance, some major chains see breakfast account for up to 45% of their total sales, driven by premium sandwiches on upgraded breads like ciabatta. This trend, along with a 7% growth in quick-service breakfast traffic in some regions, shows a clear desire for quality in the morning. You can dig into how breakfast menu expansions are driving profits on NRN.com to see just how popular these meals have become.
Ready to build your own? Start with a theme. Here are a couple of ideas to get your creativity flowing:
- The Californian: Grab some toasted sourdough. Layer it with a perfect fried egg, creamy mashed avocado, a slice of fresh tomato, a few alfalfa sprouts for crunch, and a slice of Monterey Jack.
- The Spicy Southwestern: Use a toasted ciabatta bun as your base. Add a spicy chorizo patty, a slice of pepper jack cheese, a folded omelette mixed with diced jalapeños and onions, and a dollop of chipotle aioli.
Of course, the egg itself is a huge part of the equation. Are you in the mood for a runny yolk, a clean and tidy folded omelette, or something in between? This decision tree can help you visualize the options.
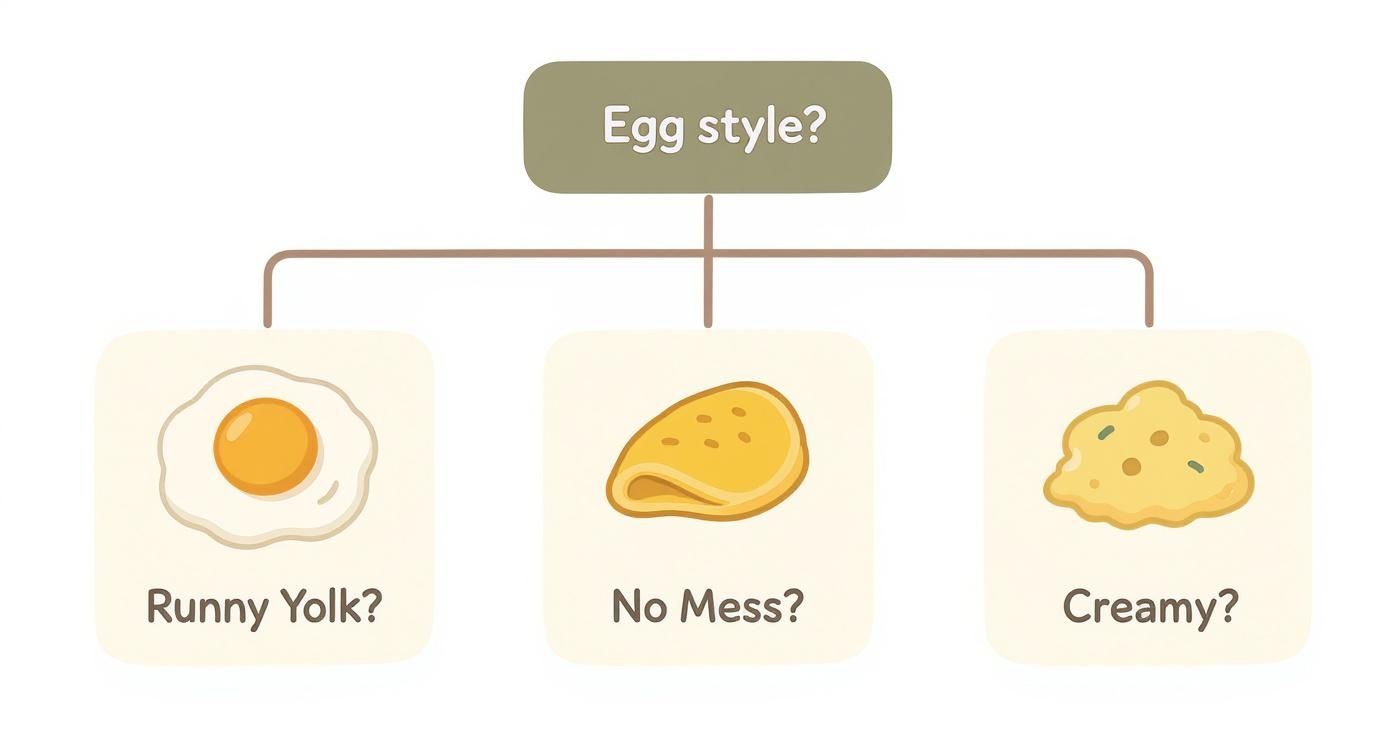
The best egg style really comes down to the kind of eating experience you want—from a neat, no-mess folded omelette to the richer, more decadent fried egg with a runny yolk.
Meal Prep and Storage for Busy Mornings
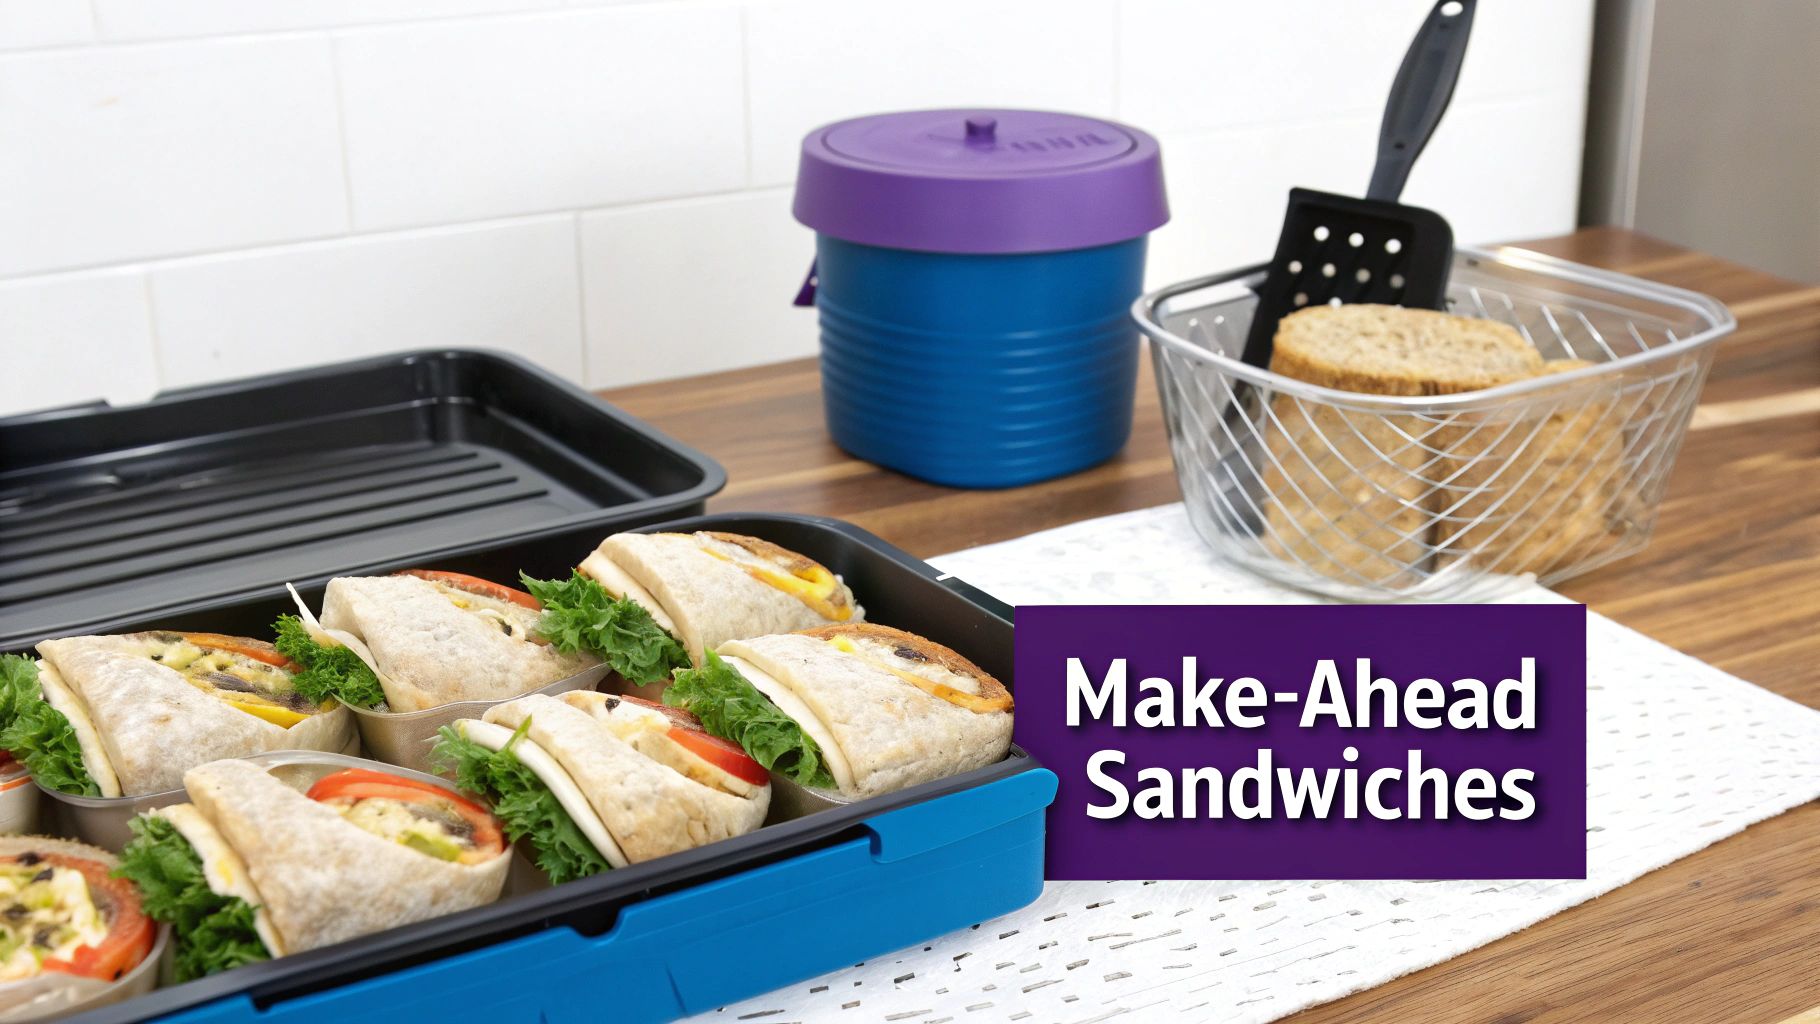
The breakfast sandwich is the unsung hero of meal prep. It's the perfect way to reclaim your busy mornings without having to sacrifice a delicious, hot meal. By putting in a little time upfront, you can stock your fridge or freezer with grab-and-go options that are worlds better than anything from a drive-thru.
The real key is in the assembly and storage. Get these two things right, and you'll have perfect sandwiches waiting for you all week long. This is all about working smarter, not harder. Let's walk through the proven methods for building sandwiches that stay fresh, avoid sogginess, and reheat beautifully.
Assembling for Freshness
The biggest challenge with any make-ahead sandwich is moisture control. A soggy sandwich is a sad sandwich, but thankfully, it's entirely preventable with a few strategic assembly tricks.
The most important rule is to let all cooked components cool completely before you even think about building your sandwiches. Assembling while things are still warm creates steam, and that steam is the number one cause of mushy bread.
Once everything is at room temperature, it's time to build your moisture barriers.
- Toast Your Bread: Always start with toasted English muffins, bagels, or buns. Toasting creates a much less absorbent surface for your ingredients.
- Use a Fat-Based Spread: A thin layer of butter or mayonnaise on the inside of your toasted bread acts as a brilliant waterproof shield.
- Strategic Layering: Place any wet ingredients, like a slice of tomato, between dry layers. A great trick is to nestle it between the cheese and the protein, making sure it never touches the bread directly.
For the best texture and flavour, it's also a good idea to hold back certain ingredients. Fresh greens like spinach or arugula and wet sauces like ketchup are best added after reheating.
My number one tip for meal prepping breakfast sandwiches is to master the wrap. A tight, secure wrap is your best defense against freezer burn and sogginess. I always use a two-layer method for maximum protection.
Wrapping and Storing Like a Pro
How you wrap your sandwiches is just as important as how you build them. First, wrap each fully cooled sandwich tightly in a piece of parchment paper. This initial layer helps absorb any minor condensation and keeps the sandwich from sticking.
Next, wrap the parchment-covered sandwich tightly in aluminum foil. This second layer provides an airtight seal, protecting it from dreaded freezer burn and locking in all that freshness. Once wrapped, just place your sandwiches in a large, sealed freezer bag or an airtight container.
Properly stored, your breakfast sandwiches will last:
- Up to 4 days in the refrigerator.
- Up to 2 months in the freezer.
The Best Way to Reheat Your Sandwich
When it's time to enjoy your prepped breakfast, you have a few great options for reheating. The goal is to get a hot, melted interior and a crisp, toasted exterior—just like it was freshly made.
- From the Fridge: You can simply crisp the sandwich in a hot pan for a minute or two per side. Another great option is to place it in a 175°C (350°F) oven or air fryer for about 5-7 minutes.
- From the Freezer (Microwave + Air Fryer/Oven): This is my preferred method for the absolute best results. First, remove the foil and microwave the parchment-wrapped sandwich for about 60-90 seconds to thaw the inside. Then, unwrap it and finish it in a 175°C (350°F) air fryer or oven for 5-6 minutes to restore that perfect crispness.
- From the Freezer (Microwave Only): If you're really short on time, you can fully reheat it in the microwave. Just remove the foil and microwave it in the parchment for about 2 minutes, flipping it halfway through. It won't be quite as crispy, but it will still be delicious.
Finishing Touches and Perfect Pairings
A great breakfast sandwich doesn't have to fly solo. The right sides and a perfect cup of coffee can take your homemade creation from simply good to a truly memorable meal. It’s all about those final details that round out the experience.
Think of it as creating balance on your plate. If you’ve built a rich, savoury sandwich loaded with bacon and sharp cheddar, something bright and acidic can cut through all that delicious fat. A few simple orange slices or a handful of fresh berries does the job beautifully, cleansing the palate and getting you ready for the next bite.
Elevating with Simple Sides
You don't need an elaborate spread to make the meal feel complete; one well-chosen side is often all it takes. For that classic diner vibe, you can't go wrong with crispy, golden hash browns or some well-seasoned home fries. They add a satisfying crunch and savoury flavour that just feels right.
If you’re leaning towards something a bit lighter, a small bowl of yogurt or a simple green salad with a sharp vinaigrette offers a fresh contrast without weighing you down. The key is to think about texture and how the side complements the main event.
The Ultimate Coffee Pairing
The right coffee doesn't just sit alongside your sandwich—it elevates every single flavour. The goal is to create a pairing where both the food and the drink taste even better together. A bold, smoky sandwich with sausage and a chipotle aioli, for instance, is a perfect match for a dark roast coffee with deep, chocolatey notes.
On the flip side, a lighter sandwich—maybe turkey bacon and Swiss on a delicate croissant—sings when paired with a medium roast that has brighter, more acidic tones. If you want to find your own perfect match, you can explore different roasts and even grab some high-quality, locally roasted coffee beans to experiment with right at home.
Pro Tip for On-the-Go Sandwiches: To keep your sandwich fresh for travel, wrap it snugly in parchment paper first. This layer absorbs any potential moisture. Then, wrap that in a layer of aluminum foil to lock in the warmth. This two-layer trick keeps it perfectly intact until you’re ready to dig in.
A Final Flourish with Sauces
Never underestimate the power of a good sauce. We're not just talking ketchup or mayo here. Think about adding a final drizzle of something unexpected, like a vibrant pesto, a zesty chimichurri, or even a sweet and spicy chili crisp. These little additions can introduce a final layer of complexity that ties everything together, making each bite an exciting discovery.
Common Breakfast Sandwich Questions
Even with the best recipe in hand, a few questions always seem to pop up when you're mastering the art of the homemade breakfast sandwich. Let's walk through some of the most common hurdles so you can build your creations with total confidence.
How Do I Keep My Sandwich from Getting Soggy?
Sogginess is the arch-nemesis of a brilliant breakfast sandwich, but thankfully, it's easy to defeat. The first, non-negotiable step is to always toast your bread. This does more than just add flavour; it creates a sturdy, less porous surface that acts as a shield against moisture.
Next up, create a waterproof barrier. A thin layer of a fat-based spread like butter or mayonnaise works wonders here. Finally, think like an architect when you're layering. Tuck wet ingredients, like fresh tomato slices, between dry ones, such as the cheese and your protein. That way, they never touch the bread directly.
For make-ahead sandwiches, here's the golden rule: let all your cooked ingredients cool completely to room temperature before you assemble anything. This one simple move prevents steam from getting trapped inside, which is the number one cause of a soggy sandwich later.
What Is the Best Way to Cook Eggs for a Sandwich?
For a tidy, structured sandwich that you can easily eat on the run, a folded omelette is my go-to. Just whisk one or two eggs, pour them into a hot, lightly oiled pan, and as the bottom sets, gently fold the edges in toward the centre. You'll end up with a neat little square that fits your bread perfectly.
Of course, if you're all about that rich, runny yolk, you can't beat a classic fried egg cooked over-easy or over-medium. Pro tip: use a metal or silicone egg ring in the pan. It will help you cook a perfectly round egg that sits beautifully on an English muffin without spilling over the sides.
Can I Make a Big Batch for a Group?
You absolutely can, and the sheet pan method is a total game-changer for feeding a crowd. Whisk a dozen eggs with a splash of milk and whatever seasonings you like, then pour the mixture onto a greased and parchment-lined baking sheet. Pop it in the oven and bake until the eggs are fully set.
While the eggs are cooking, you can throw your bacon or sausage patties on another sheet pan to cook at the same time. Once everything is done, just slice the sheet of baked egg into perfect sandwich-sized squares. It's an incredibly efficient assembly line for a hungry group.
For those mornings when you’d rather leave the cooking to the experts, East End Annie's has you covered with handcrafted sandwiches that are always worth the trip. Check out our full menu and catering options at East End Annie's.